
This article covers Pendo Rent 2.0 screens. Which screens a lease opens depends on the lease itself, not your account switch. Not sure which you're looking at? See: Which version am I looking at?
Pendo writes the lease, turns it into a PDF, emails it to the people who need to sign, and tracks who has signed. Here is the whole run, from the Leases page to Send.
1. Start from the Leases page #
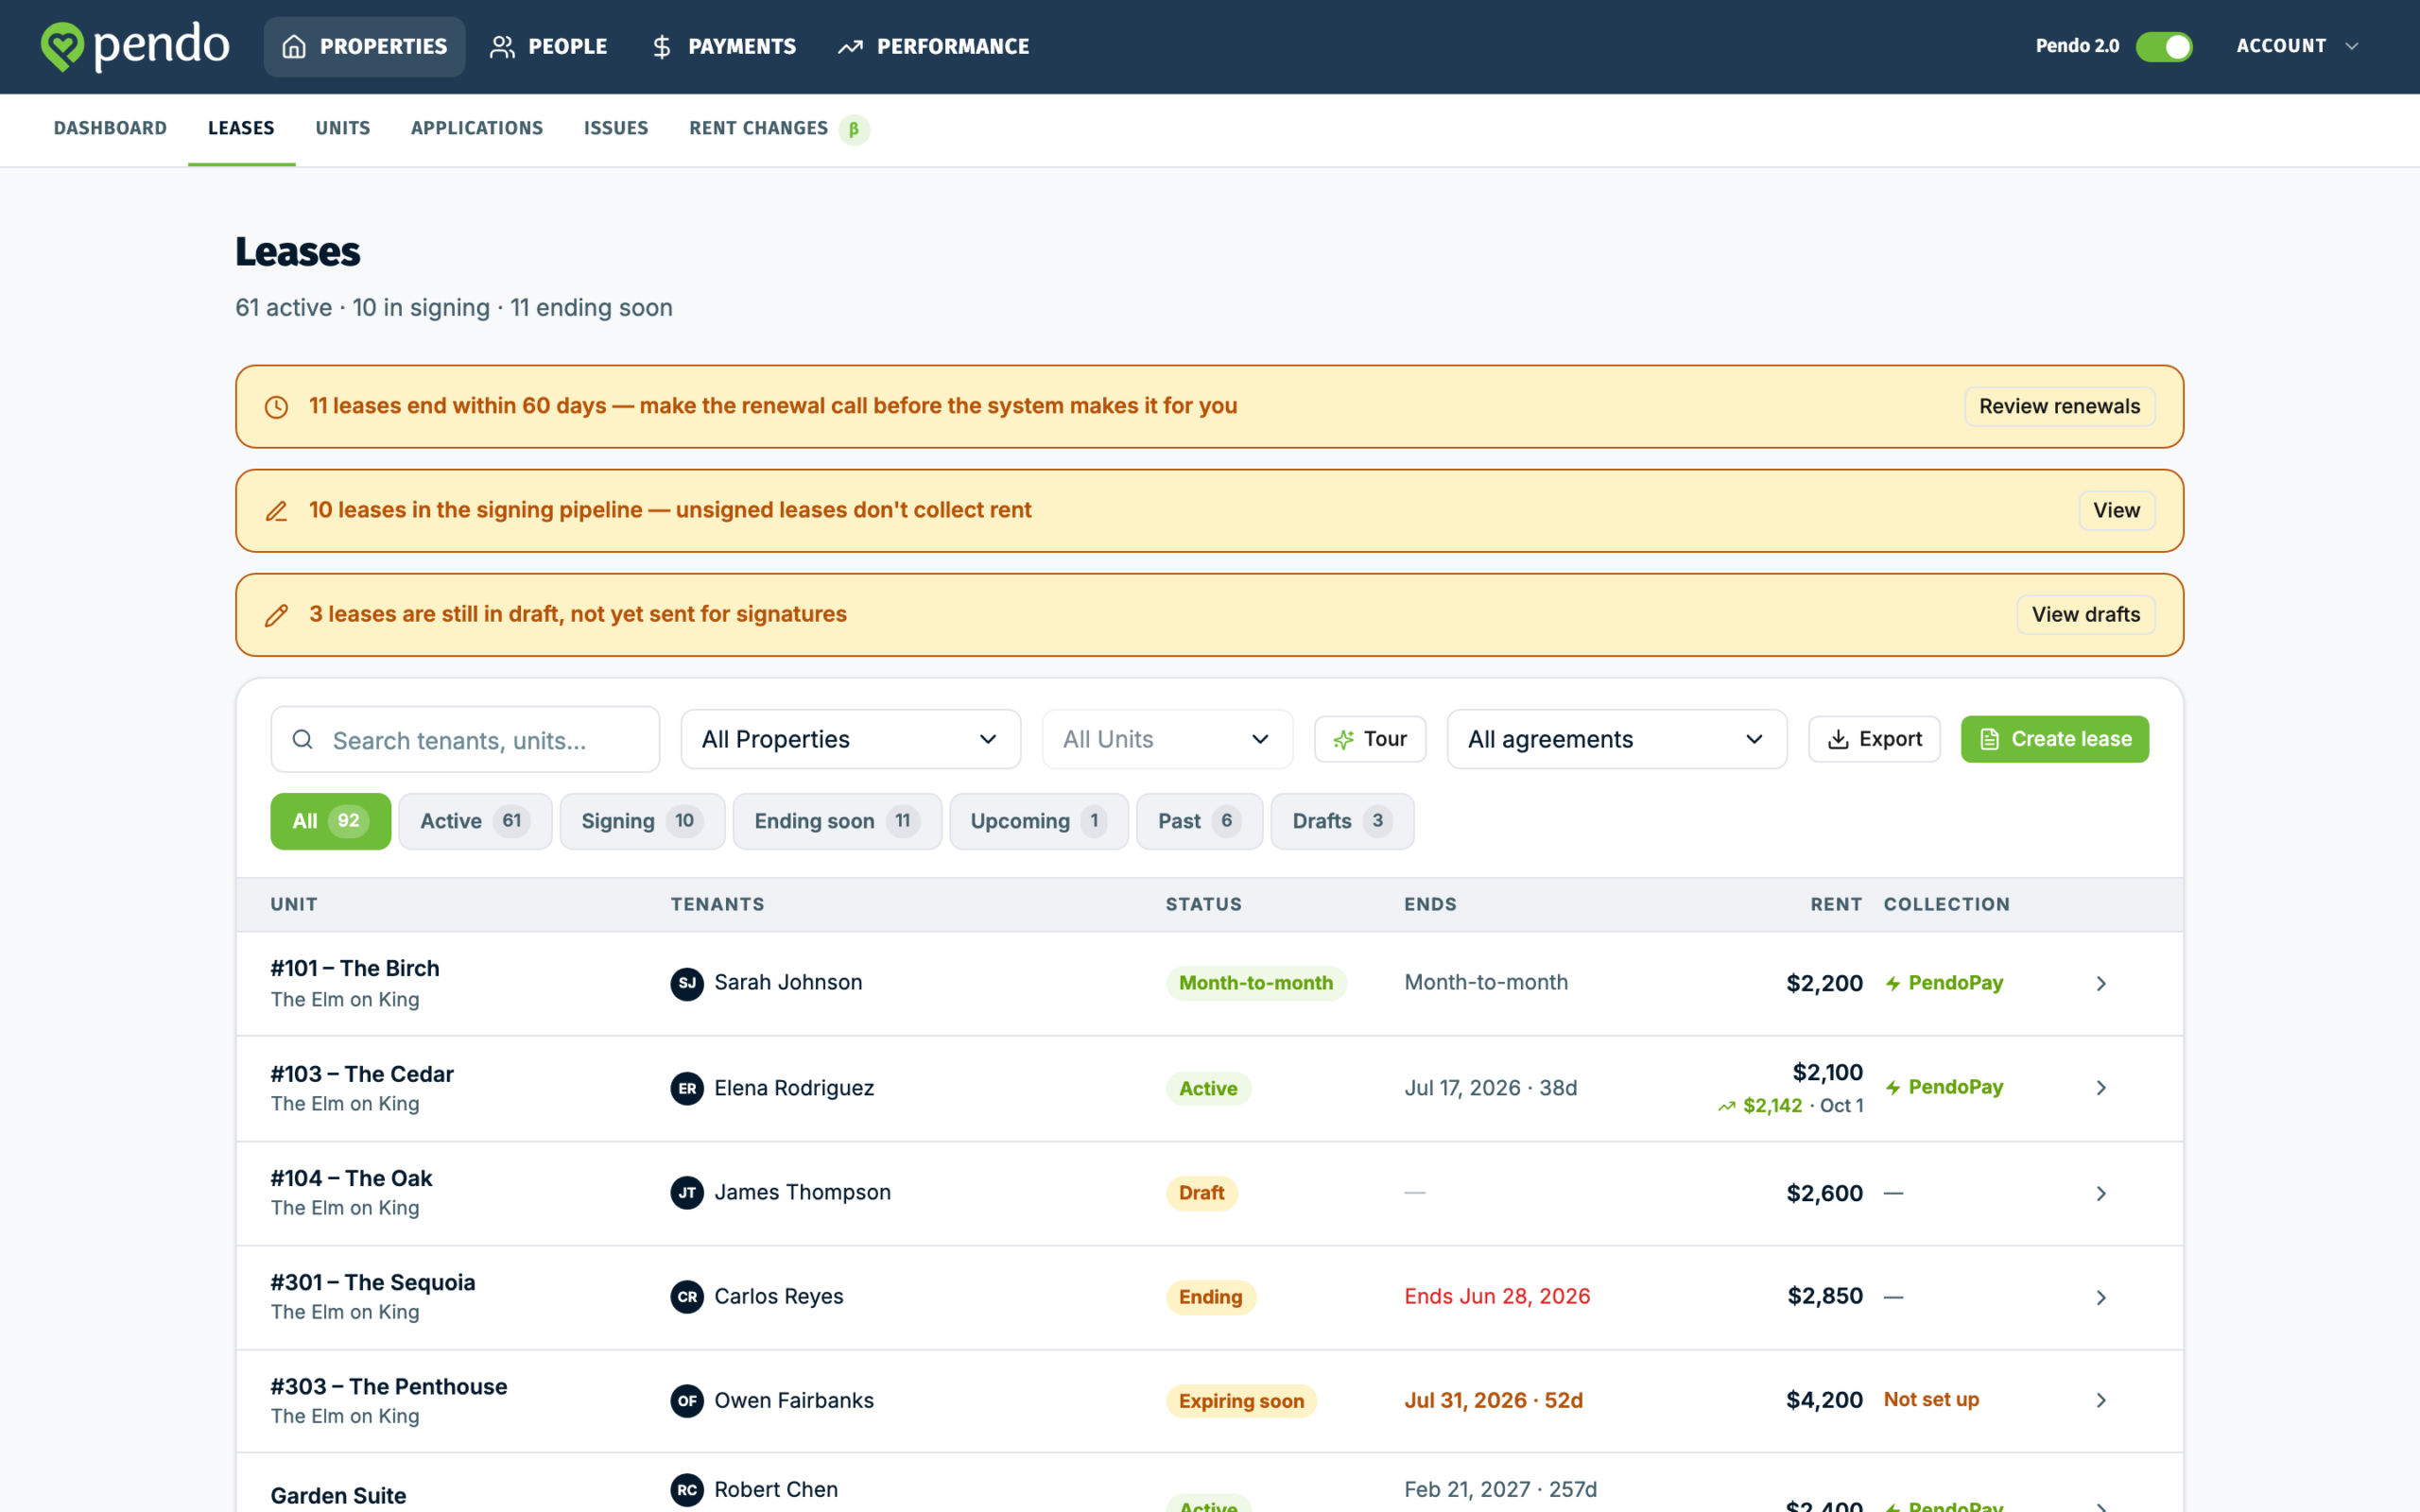
Open Properties, then the Leases tab, and click Create lease. Leases is a tab, not its own item in the top menu.
The same page also has Export, which downloads your leases as a CSV file. It follows the property or unit you have picked, not the tabs or the search box.
2. Pick the property, the unit, and how the lease is made #
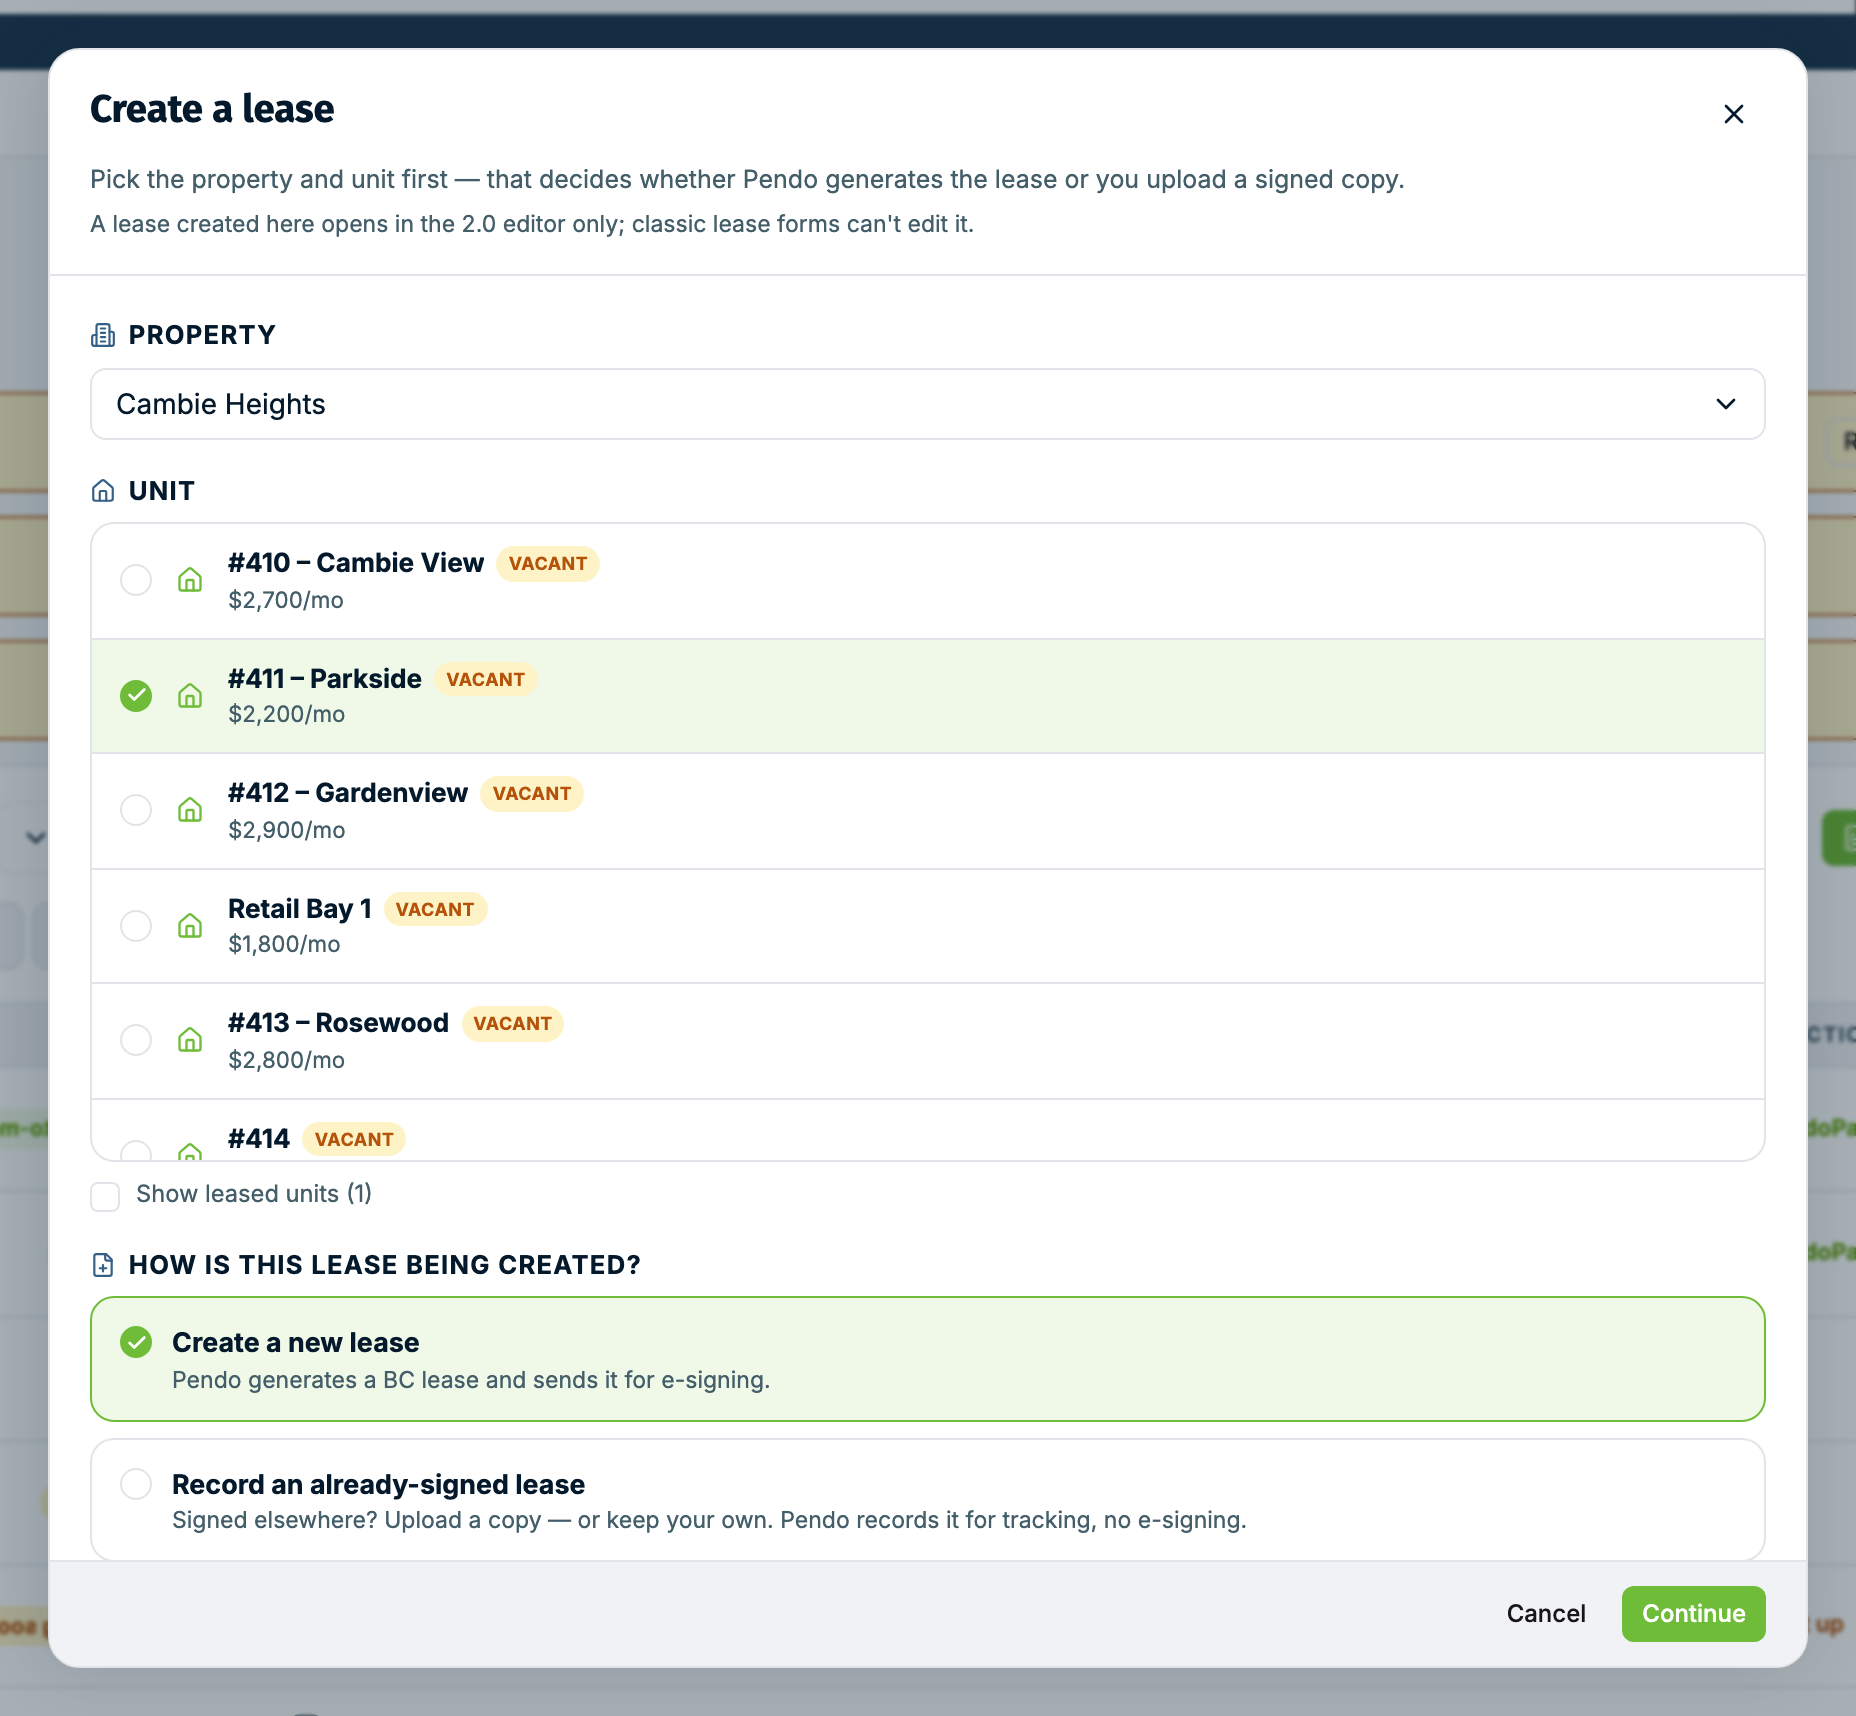
Choose the property, then the unit. Occupied units are hidden by default; tick Show leased units to see them. Picking one raises a notice about the existing lease and holds back the rest of this step until you deal with it: see Replacing a tenant in a unit.
If the unit already has a draft, Pendo says This unit already has a draft lease and names who it is for. Resume draft opens it. Start a new lease begins a separate one, and the earlier draft stays in the Drafts tab until you delete it.
Under How is this lease being created?, pick Create a new lease so Pendo generates the lease and sends it for e-signing. Record an already-signed lease is for a lease you signed elsewhere and just want tracked. Click Continue.
In Ontario, Quebec, Manitoba, and New Brunswick the wizard uses an upload flow instead. Complete and sign the official provincial form outside Pendo, enter the lease terms and parties here, and upload the signed copy. Commercial properties use that same upload flow in every province, and creating a commercial lease needs the Plus plan or higher. Below that the choice is greyed out.
3. Property & terms #
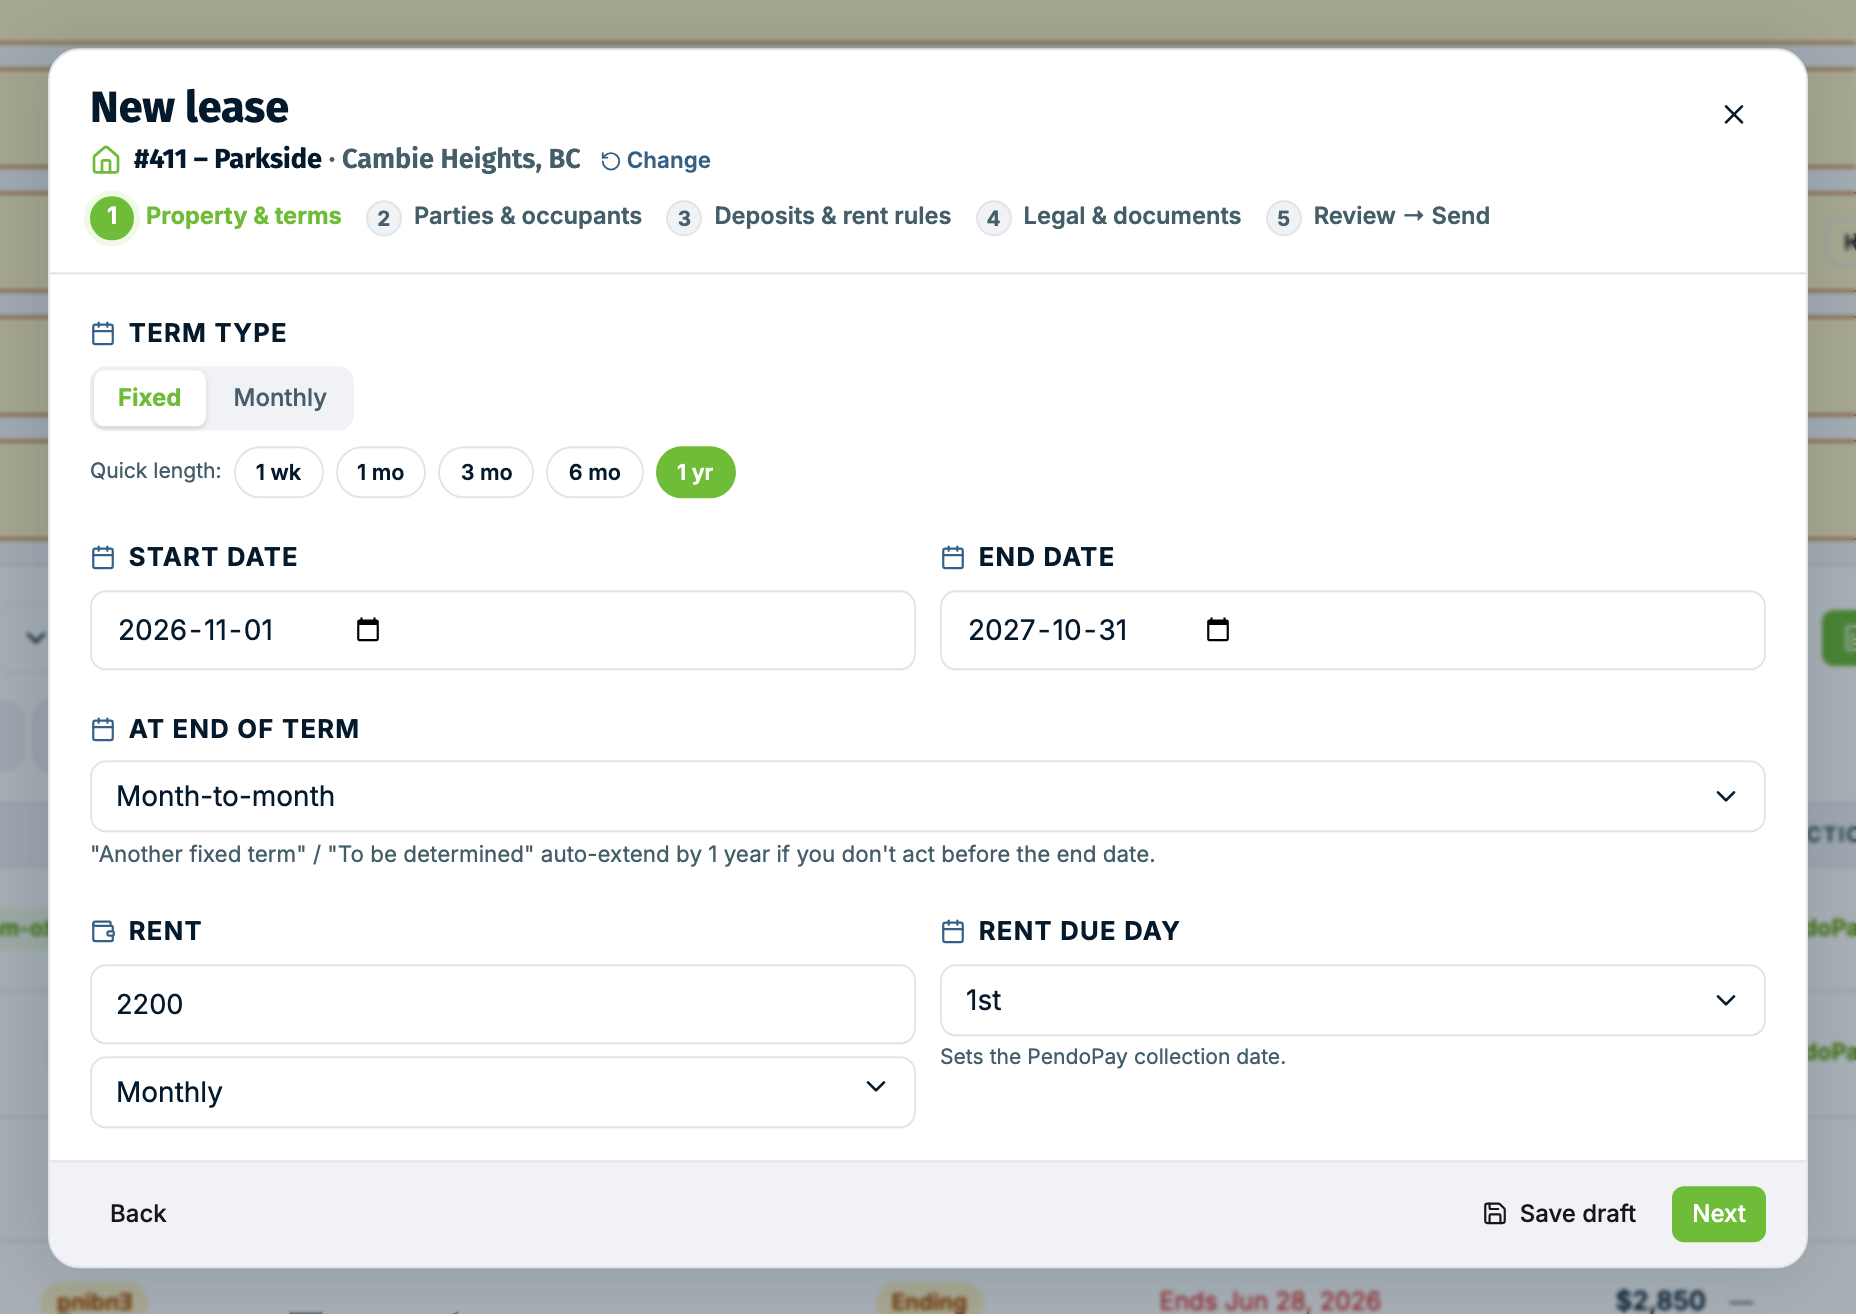
Set the term type, start and end dates, what happens at the end of the term, the rent, how often it is due, and the rent due day. The due day is what PendoPay collects on, so get it right.
On a fixed term, the Quick length buttons (1 wk, 1 mo, 3 mo, 6 mo, 1 yr) fill in the end date from the start date.
4. Parties & occupants #
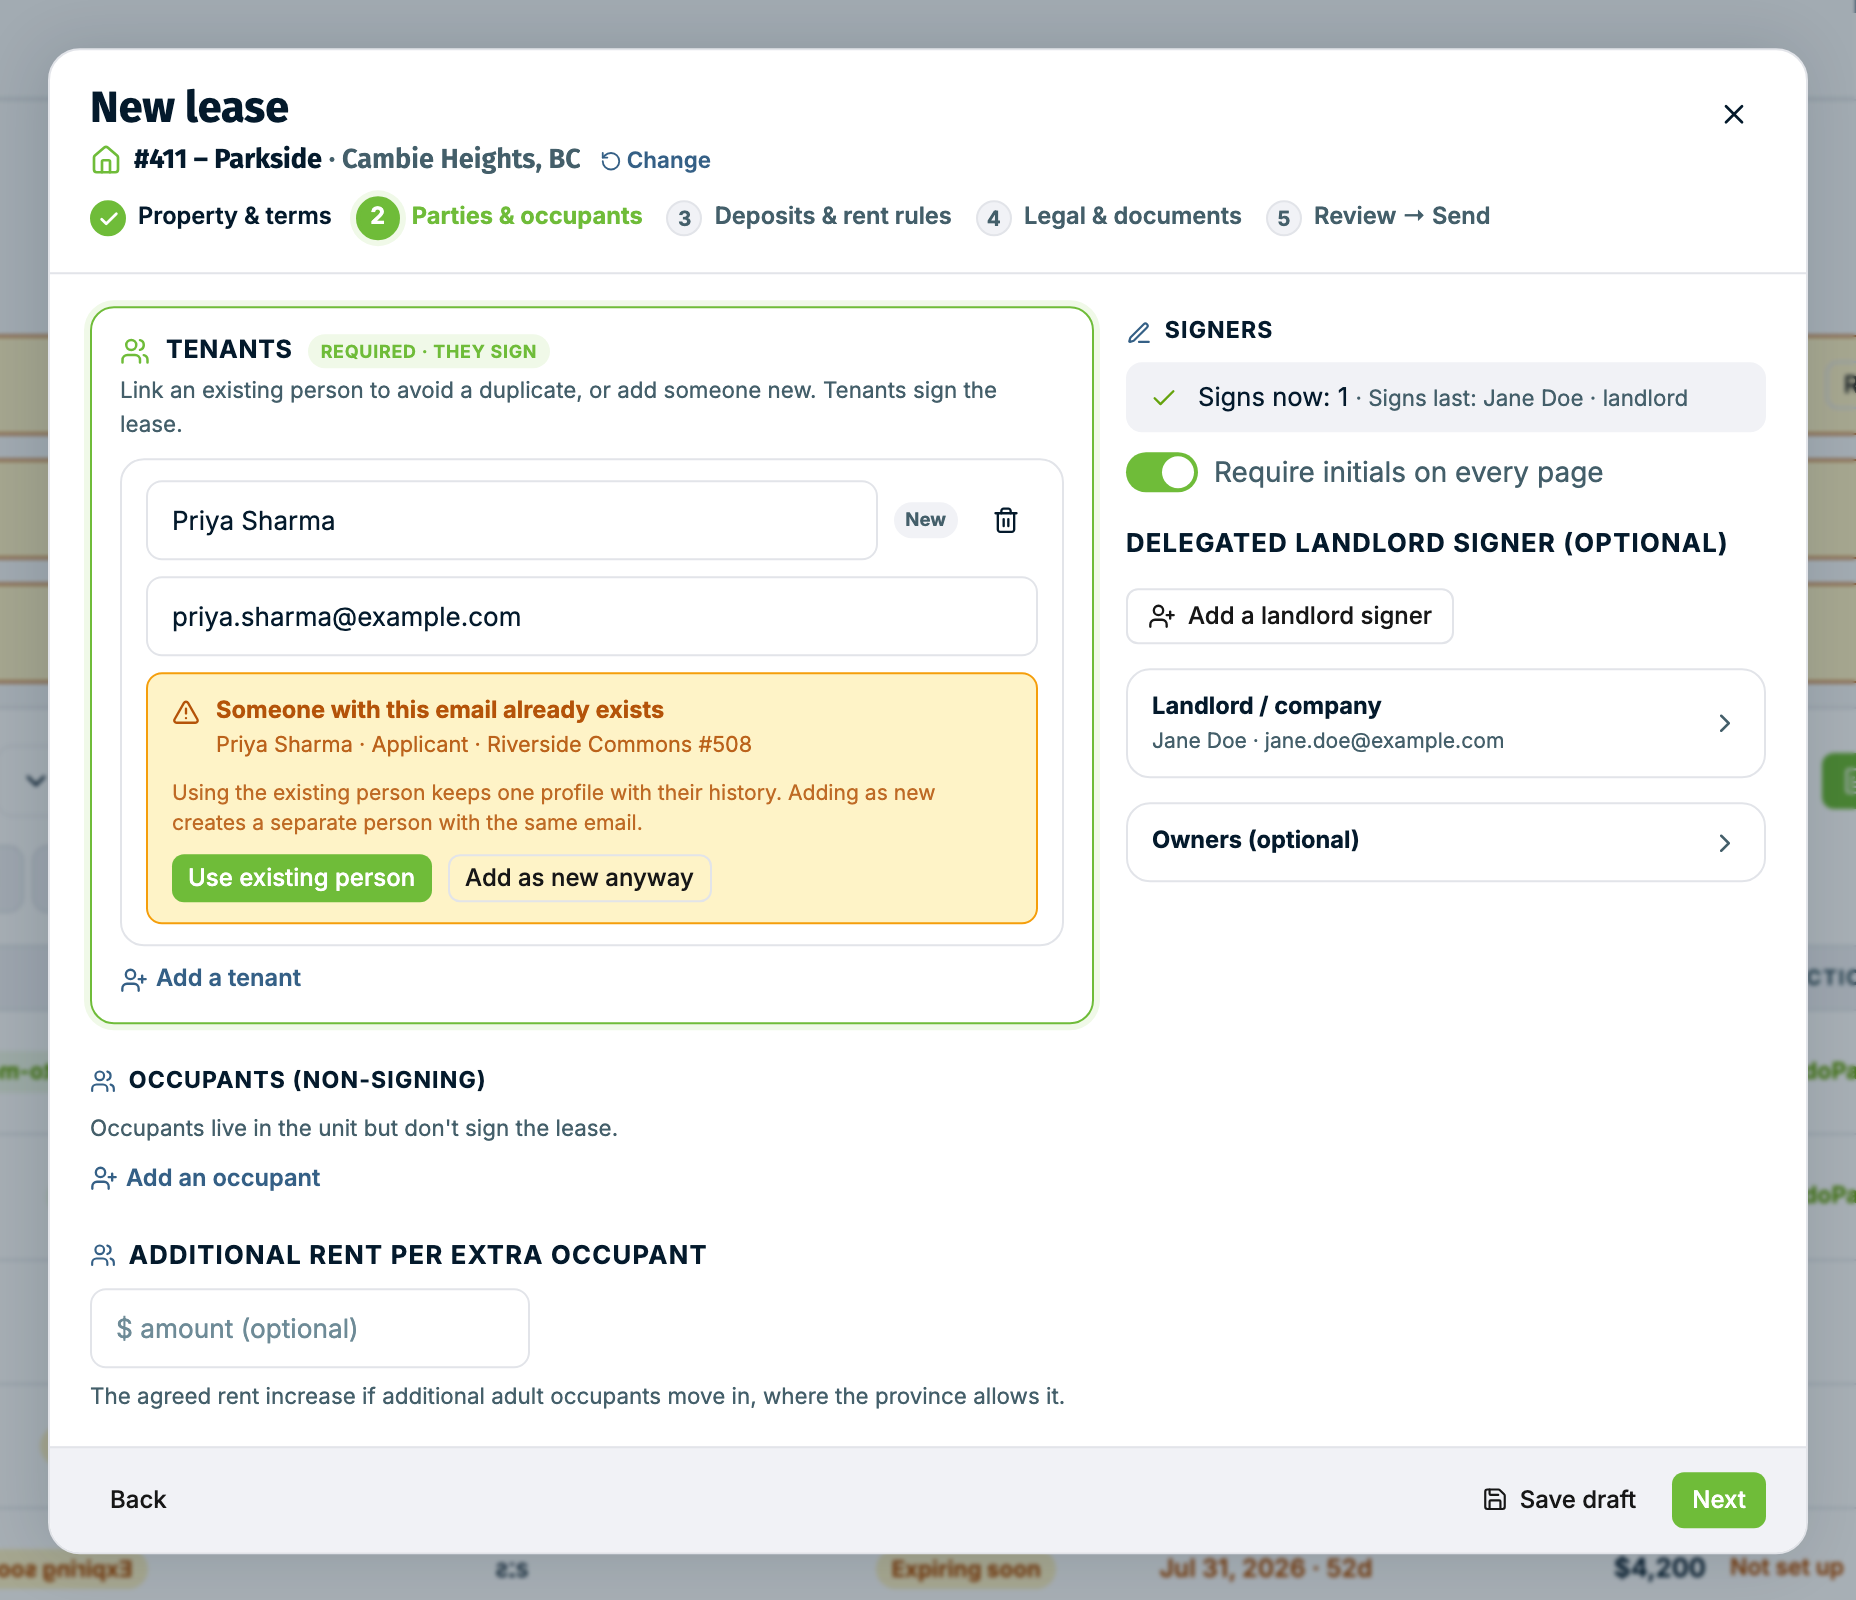
Add the tenants, any occupants, and the landlord. Tenants sign, so each one needs an email address. Link an existing person where Pendo offers it, so you don't create a duplicate.
Under Landlord / company, choose Individual or Company. For a company, enter its legal name and the full name of the person who signs for it. That is how the landlord appears on the lease.
The Signers summary shows who signs now and who signs last. You always sign last.
5. Deposits & rent rules, then Legal & documents #
Deposits & rent rules is where the damage deposit, any other deposits, fees, and what the rent includes go. Those are all optional, with one exception: on a BC lease you are creating digitally, you must fill in Dated at (date), B.C., and Next stays blocked until you do. A BC lease you are recording or uploading does not ask for it.
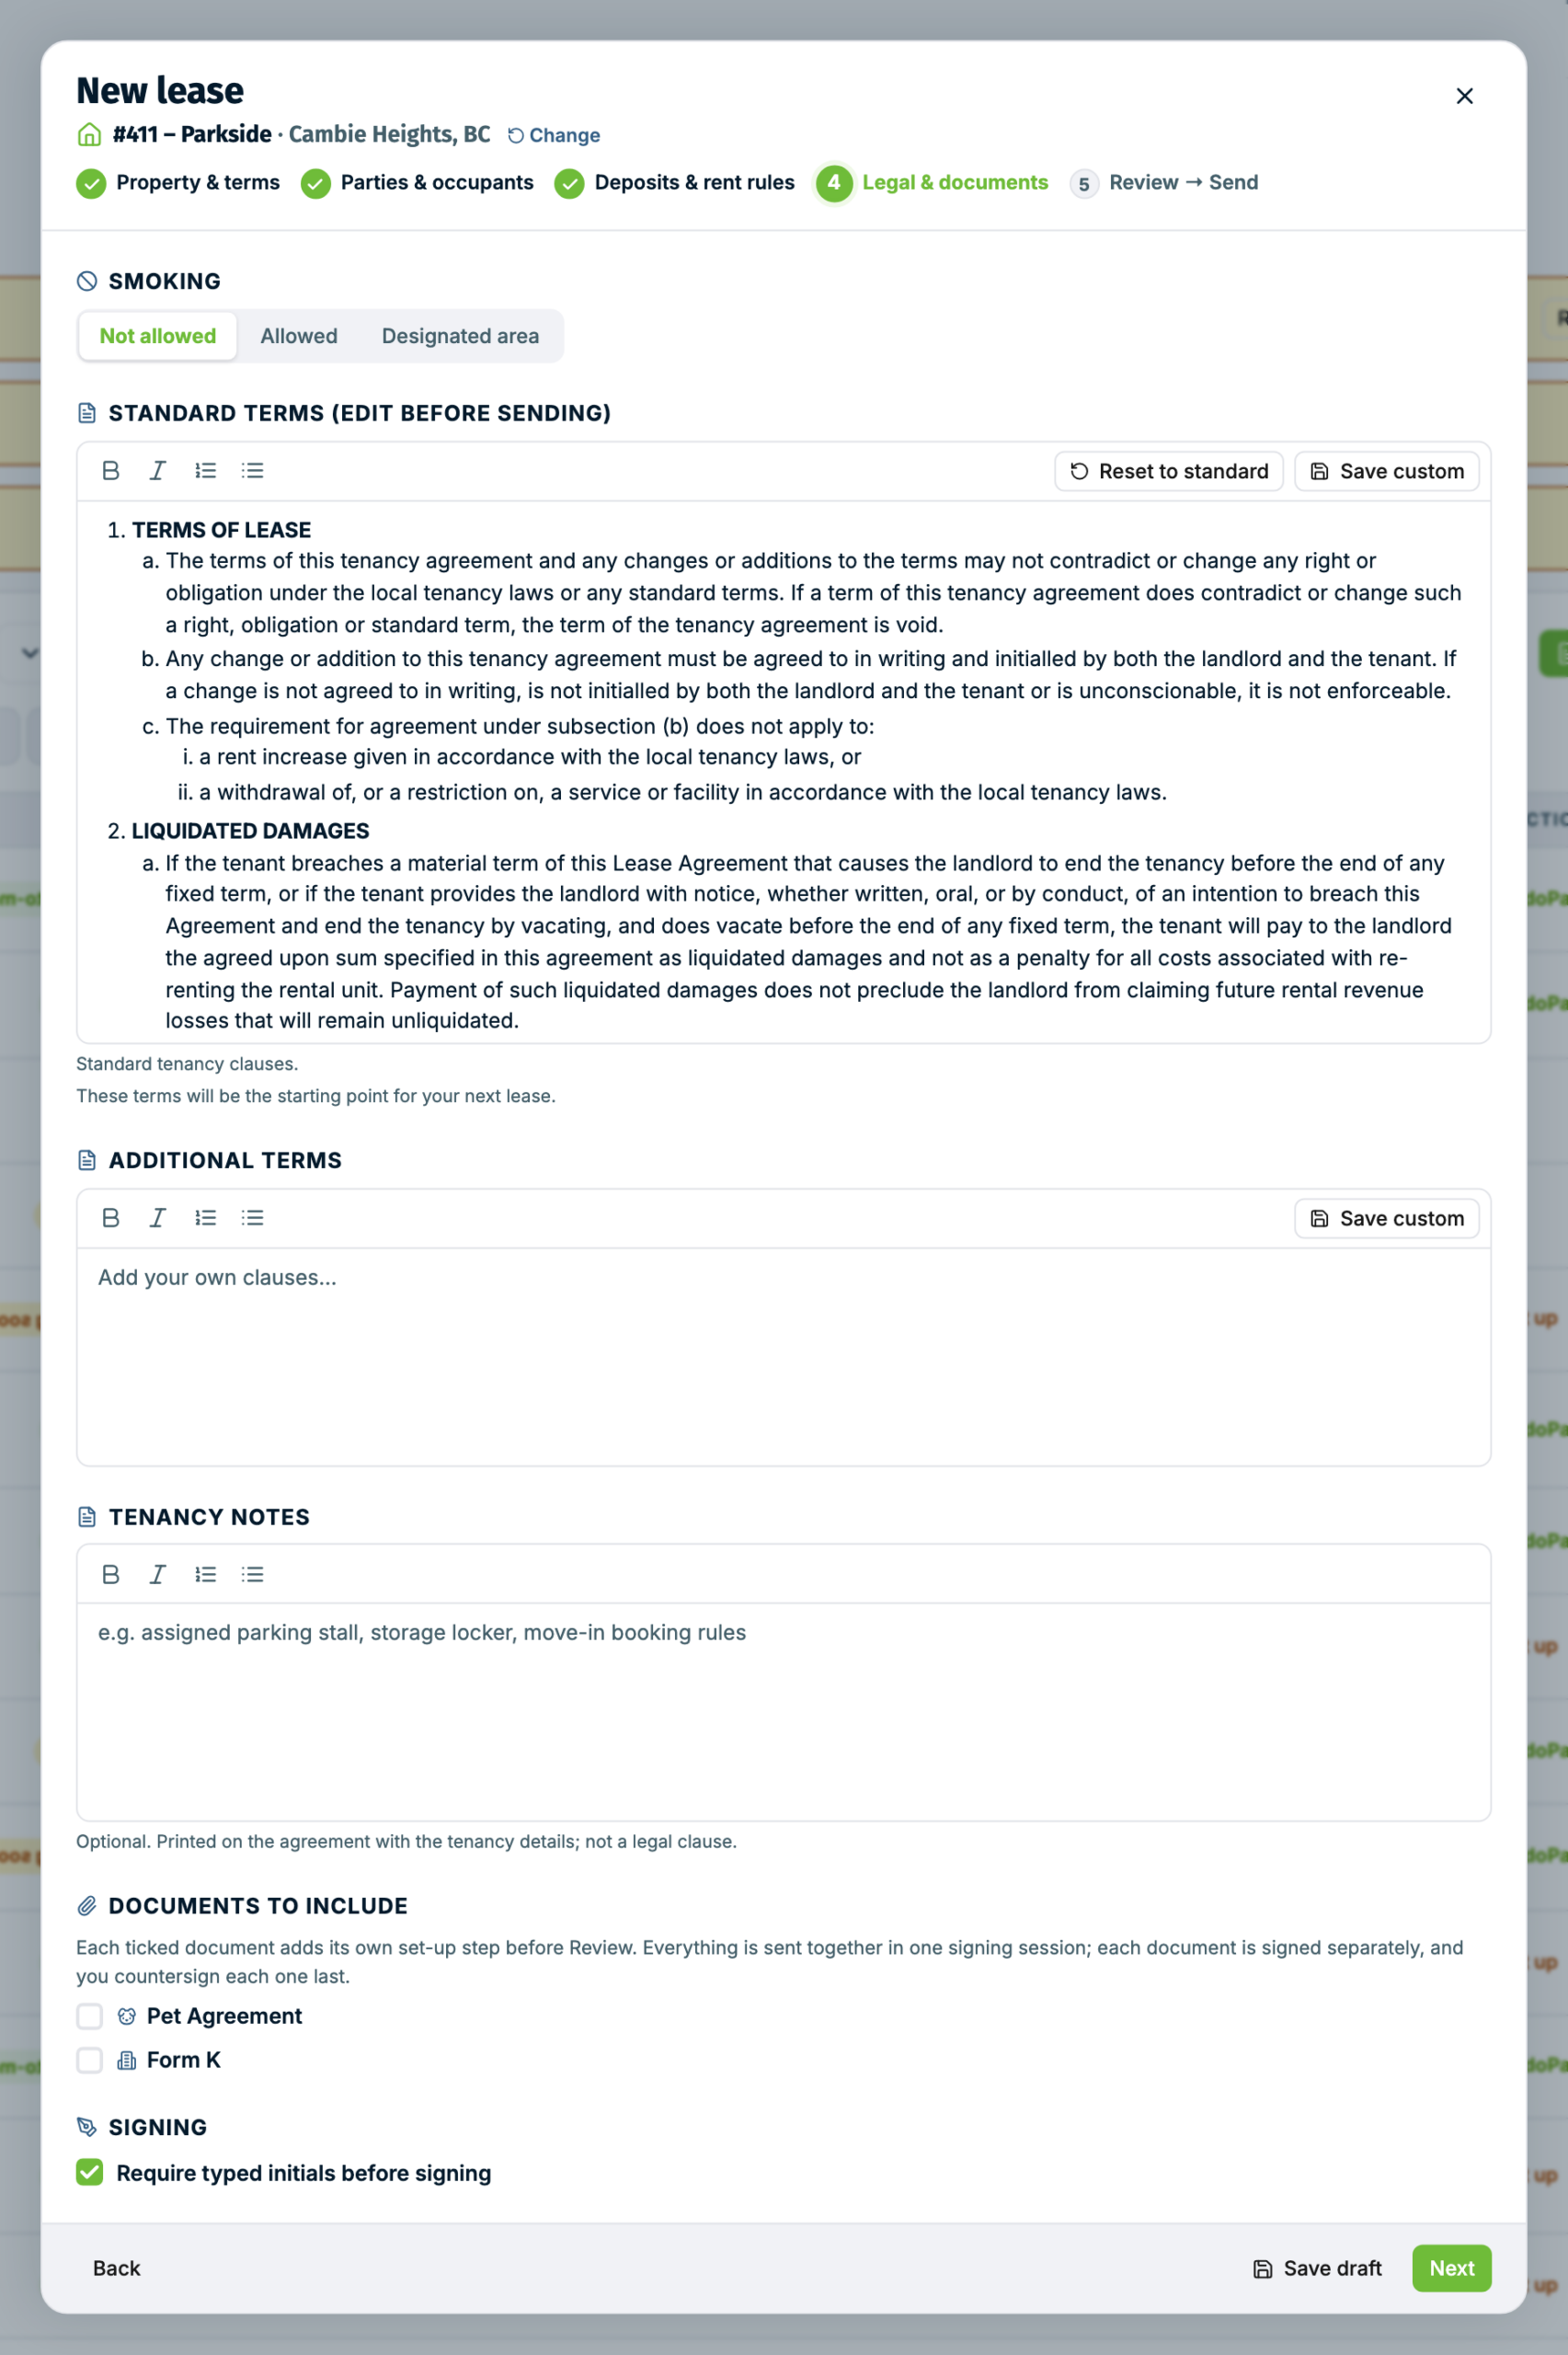
Legal & documents holds the smoking rule, the lease terms, your own additional terms, tenancy notes, and the documents that go out with the lease.
The terms box starts with the terms from the most recent lease on your account that has terms of its own, labelled Terms from your last lease, so read them before you send. On your first lease it starts with the standard terms for the province. Reset to standard puts the standard terms back. Save custom keeps your wording as your own template, and Load custom, which appears once you have saved one, brings it back in. On a LandlordBC member account these three buttons are not shown for properties LandlordBC covers. The terms cannot be left empty: if a lease genuinely has none, type N/A.
Under Documents to include, tick a pet agreement or a Form K to send one with the lease. Ticking one adds a short set-up step before Review. The pet agreement box is greyed out while pets are turned off, and the line under it says whether that is on the property or on the unit. A unit set to no pets wins over a property that allows them. Form K is offered on BC strata properties. Other documents are added to the lease afterwards, not here.
Every signer initials the key sections of the lease by default. To skip initials, untick Require typed initials before signing. It is the same setting as Require initials on every page on the Parties step, so changing one changes the other.
6. Review, then Send #
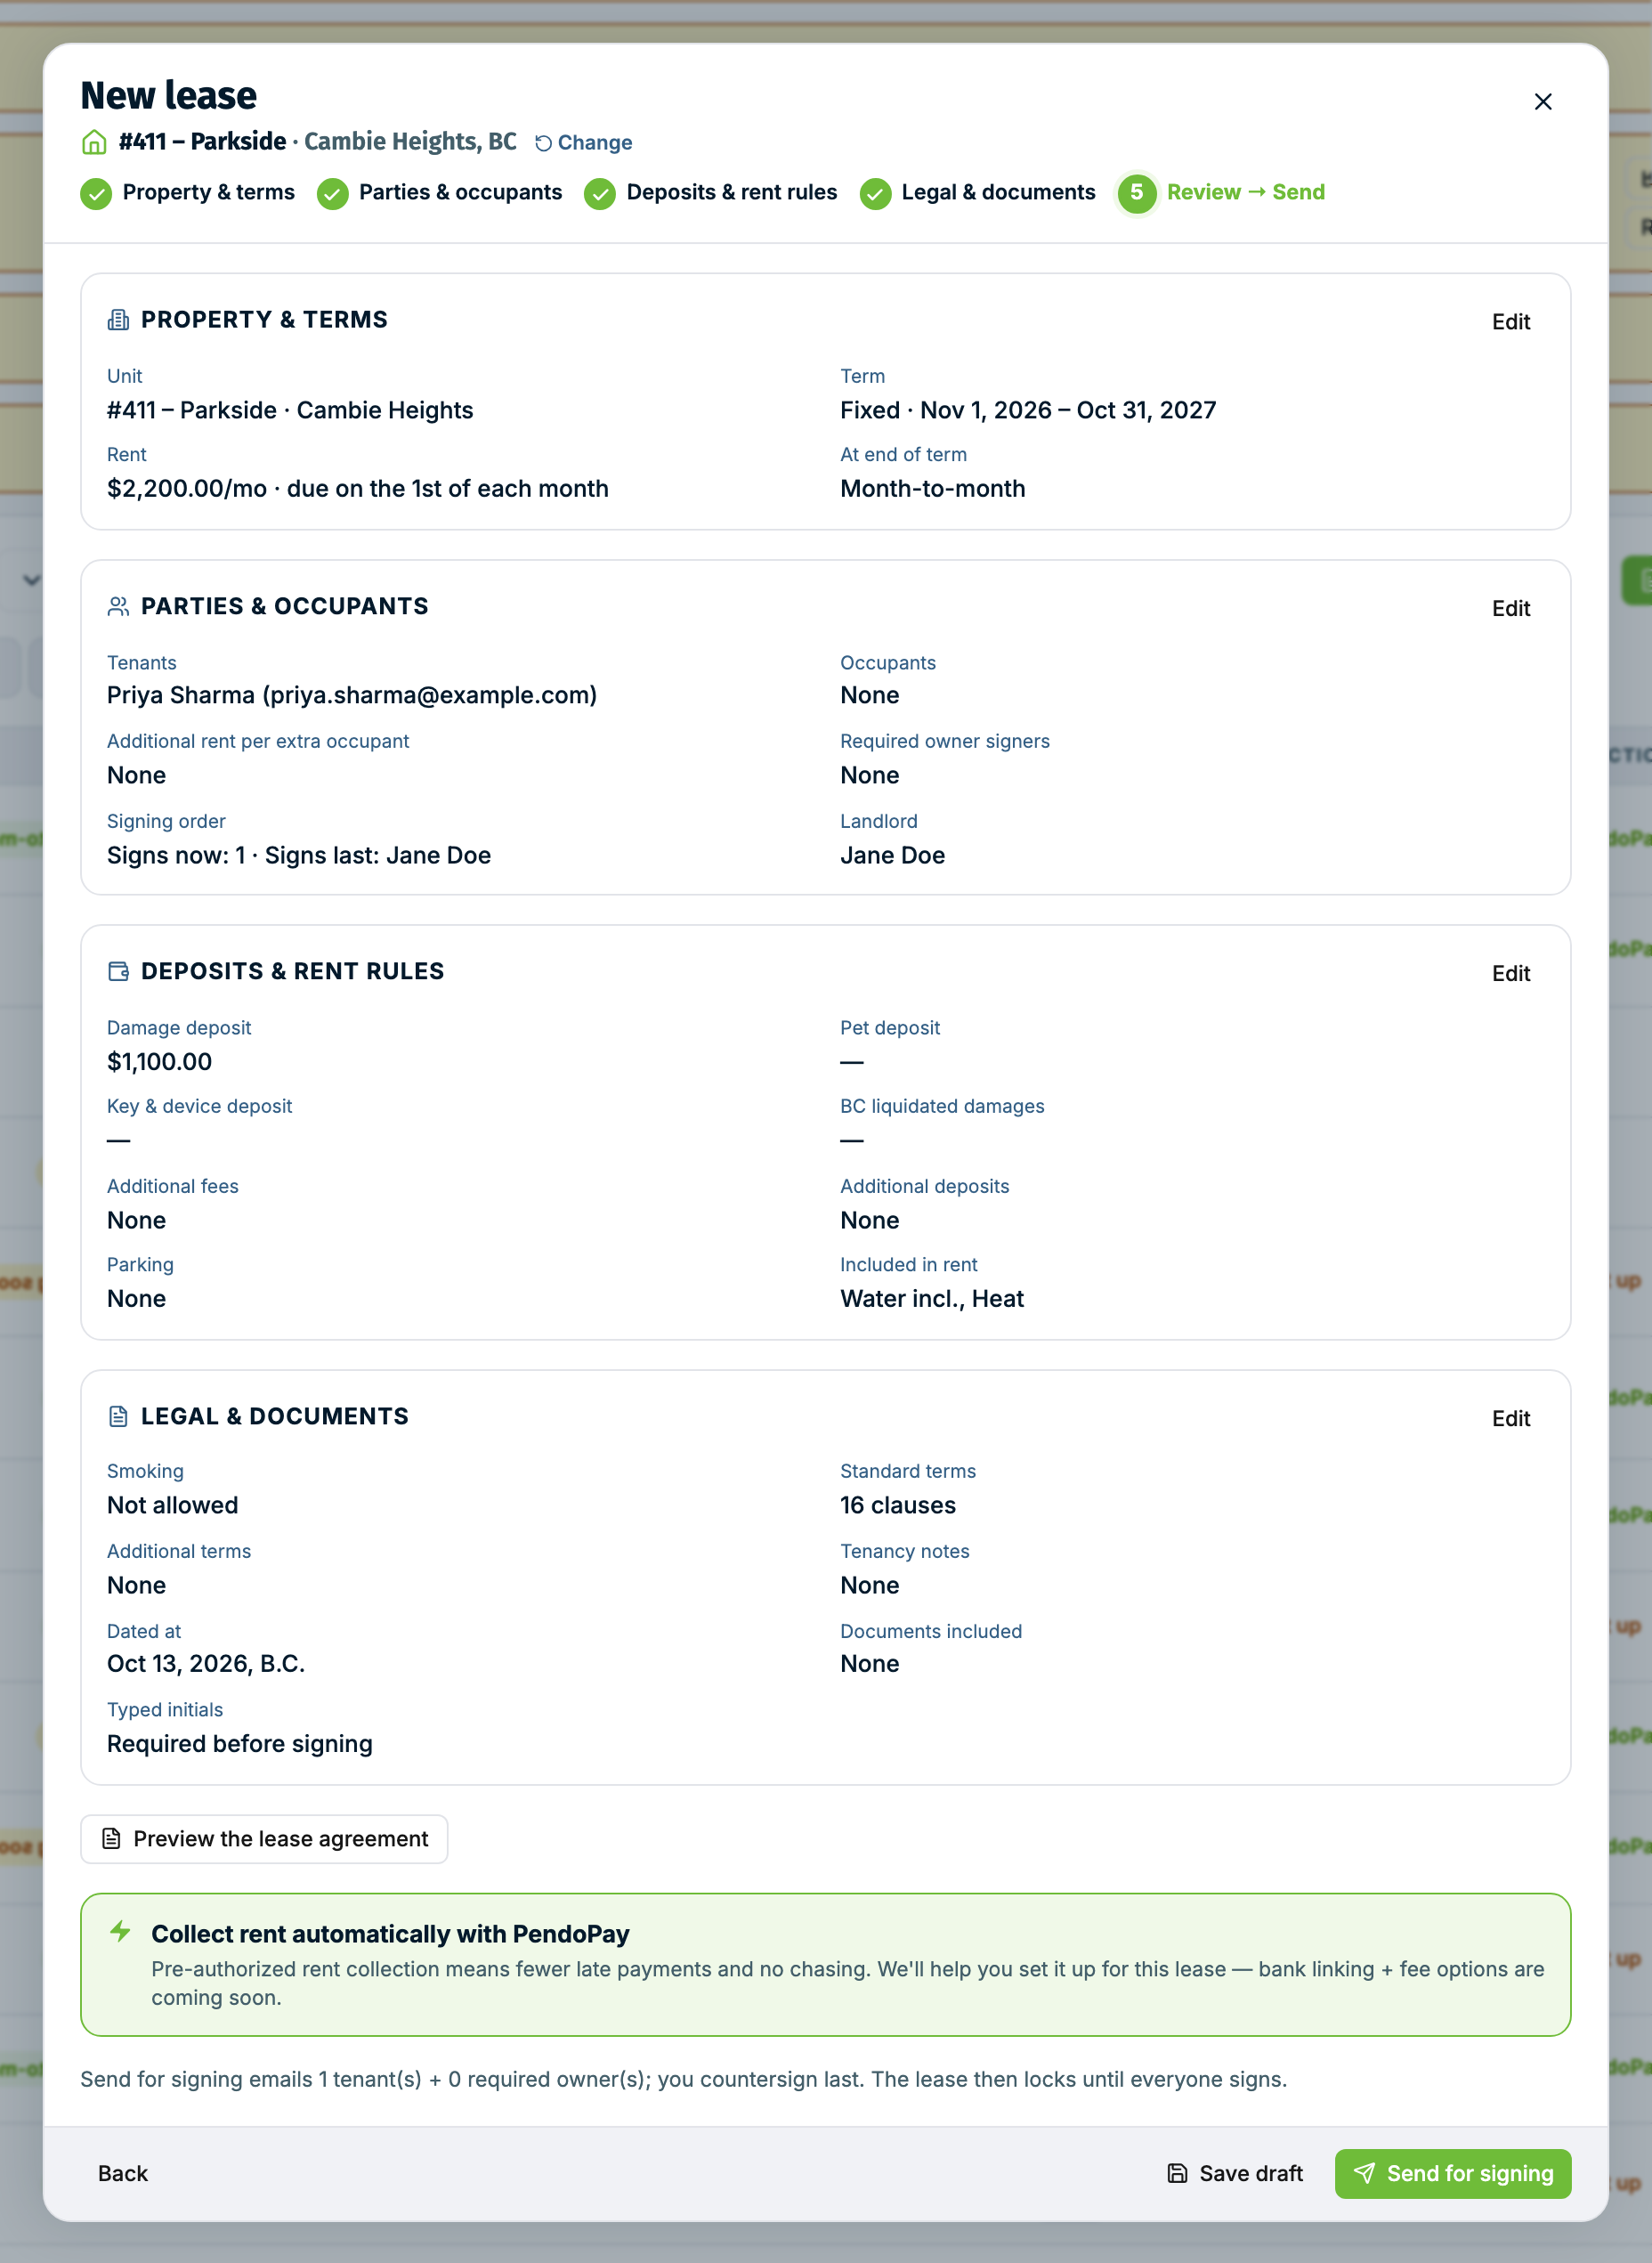
The last step is Review → Send. Read the summary and use Edit on any group you want to change.
Preview the lease agreement opens the real PDF your tenants will sign, so you can read it exactly as they will. Pendo saves the lease as a draft first, and asks before it does.
When it reads right, click Send for signing.
Not ready? Save draft keeps everything and puts the lease in the Drafts tab. Delete draft removes it.
What Send does #
Pendo produces the lease as a PDF and emails a signing link to every tenant and every required owner. Everyone reads and signs that same PDF, and it does not change while signatures are collected. You countersign last. Its status on the Leases page becomes Signing, with a count of how many have signed.
If Pendo cannot produce the document, nothing is sent. You see "We couldn't prepare the lease document, so nothing was sent." Nobody has been emailed and the lease is unchanged, so try again.
The lease stays editable until somebody signs. Up to that point the lease offers Edit lease: make the change and re-send, and Pendo tells you nothing is discarded. Once any signature lands, the way to change it is Revise & resend, which discards the signatures collected so far, so everyone signs again. Once everyone has signed, including you, the signed agreement can no longer be edited.
Your tenant gets an email from Pendo that names the property and is signed off with your name. There is no account to create and no password. See: What your tenant sees.